COURSE NAVIGATION
- ▶ Pixometry
- ▶ What is Pixometry?
- System requirements
- Access to network folders
- Installation
- ▶ General user-interface navigation
- ▶ Channel types
- ▶ Settings image processing channel
- ▶ Settings of a cropping channel
- ▶ Settings of a routing channel
- ▶ Settings of a Device Link channel
- Workflows
- ▶ Photoshop Inspector
- ▶ Indesign JobClient (Plugin)
- ▶ Support
- ▶ Tips & Tricks
- How to upgrade from previous versions
- Google Vision API configuration and use-cases
- Cropping Channels
- Best practices to tune enhancement settings
- Processing CMYK images
- Camera RAW file support
- Processing PDF files
- Check if images are already processed
- XMP routing
- To resample or not to resample
- File sizes
- PSD Support
- ▶ Pixometry Integration options
- XML Jobtickets
- Image node tag definitions (the only mandatory node!!)
- Input node tag definitions
- Size node tag definitions
- QualityCheck node tag definitions
- Workflow node tag definitions
- PDF node tag definitions
- GrayscaleConversion node tag definitions
- ImageEnhancement node tag definitions
- IPTC node tag definitions
- JobControl node tag definitions
- Output node tag definitions
- ▶ Pixometry Imagin
- ▶ Pixometry (on prem edition)
- ▶ What is Pixometry?
- ▶ System Requirements
- ▶ Installation and registration
- Start the user-interface
- ▶ General user-interface navigation
- ▶ Channel types
- ▶ Settings image processing channel
- ▶ Settings of a cropping channel
- ▶ Settings of a routing channel
- ▶ Settings of a Device Link channel
- ▶ Settings of a Purging channel
- ▶ Multi-server setup (cluster)
- ▶ Photoshop Inspector
- ▶ Indesign JobClient (Plugin)
- ▶ Working with licenses
- ▶ Support
- ▶ Tips & Tricks
- How to upgrade from previous versions
- Google Vision API configuration and use-cases
- Cropping Channels
- Best practices to tune enhancement settings
- Processing CMYK images
- Camera RAW file support
- Processing PDF files
- Tuning performance and memory settings
- Setting up a one2many workflow
- Check if images are already processed
- XMP routing
- To resample or not to resample
- File sizes
- PSD Support
- Restore backup database
- ▶ Pixometry Integration options
- XML Jobtickets
- Image node tag definitions (the only mandatory node!!)
- Input node tag definitions
- Size node tag definitions
- QualityCheck node tag definitions
- Workflow node tag definitions
- PDF node tag definitions
- GrayscaleConversion node tag definitions
- ImageEnhancement node tag definitions
- IPTC node tag definitions
- JobControl node tag definitions
- Output node tag definitions
Workflows
With workflows you can connect local input and output folders to your channels. Channels are like profiles, or a set of settings with which your images are processed in the Pixometry cloud.
A workflow is simple to setup. In the UI, click the setting wheel, the first of the main navigation buttons in the upper right part of the UI. From the menu that appears on the left side of the UI, choose "Workflows".
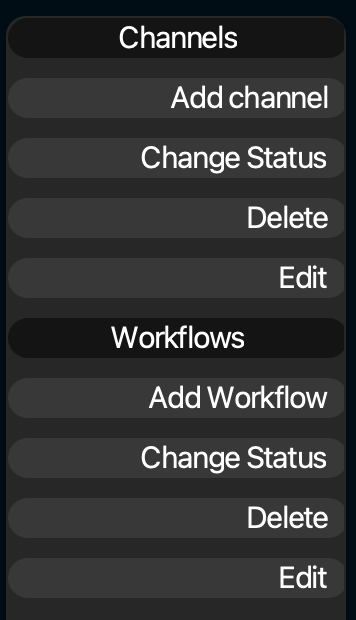
You can then see the workflows that already exist, add a workflow and change the status (from Active to Standby or vice versa). By selecting a workflow in the main area of the UI and clicking "edit" you go to the settings. But this can also be done by double clicking a workflow or clicking on the small arrow inside the workflow to open the settings.
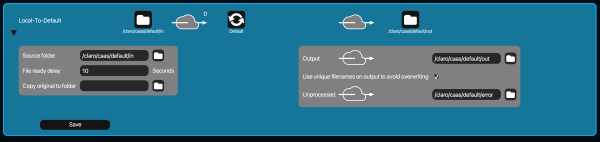
You can fill in input, output and error folders. In the middle of the screen you can see to which channel this workflow connects, in the screenshot that is the "Default" channel.
File ready delay
Files should not be picked up from the input folder before they are completely written there. Therefore the file-size is monitored. The file-ready-delay is the time in seconds that the file-size must be stable before the file is picked up for processing. If you are working with large files and network folders, this value might need to be set to a higher level.
Copy original to folder
Make a copy of the original image and save it to the folder you can select here.
Use unique file names on output to avoid overwriting
If a file is to be written to the output folder but a file with the same name already exists there, the file name will get a numbered suffix to avoid overwriting of the file that was already there.