To start working with Inspector, a few configuration items need to be checked…
After starting Inspector, click the Setup button. You will see a window as in the screenshot below.
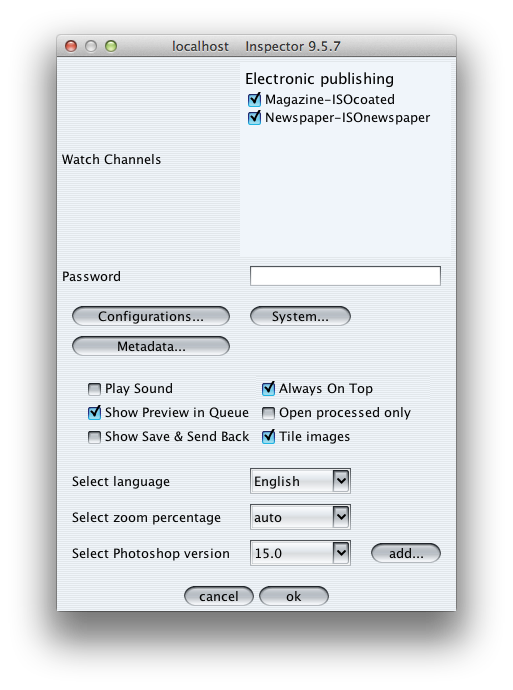
Watch channels
First of all, you need to select the channels of which you want to see the images on this workstation. Note that multiple workstations may be watching the same channels. Once a retoucher opens an image in Photoshop, it is automatically locked for the other users. In the screenshot above, we have two channels selected. The “Electronic publishing” item does not have a checkbox in front of it, and thus, I cannot select it. This is because “Electronic publishing” is a group of channels. By clicking on “Electronic publishing” I can see which channels are part of that group and I have the ability to select individual channels in the group.
Now you are ready to start using Photoshop Inspector! Below we continue with the other options in the setup window.
Password
This field allows you to set a password on the Inspector setup to avoid tinkering with the Inspector setup. Next time you go to setup, the password needs to be provided. By making the field empty again and confirm that, the password is removed again.
Configurations…
The “Configurations…” button opens a new window as in the screenshot below.
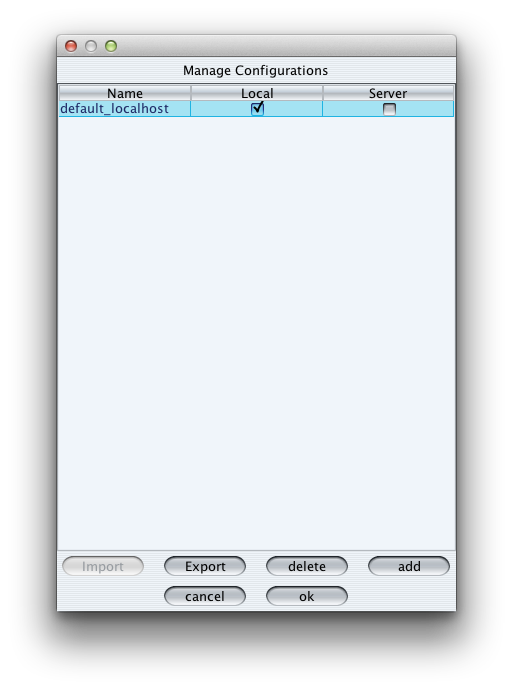
This window allows you to store local configurations on the Pixometry server for re-use on other workstations, or download an already uploaded configuration for use on the workstation you are on. In the screenshot above, I see only my local configuration. The server checkbox is unchecked, so the configuration is only local. By selecting the configuration and clicking the “export” button, I export my local configuration to the server. A configuration that is only available on the server and not yet local, I can use the “import” button to import that configuration to my local workstation. The delete button lets you delete (local) configurations.
System…
A few settings as in the screenshot below:
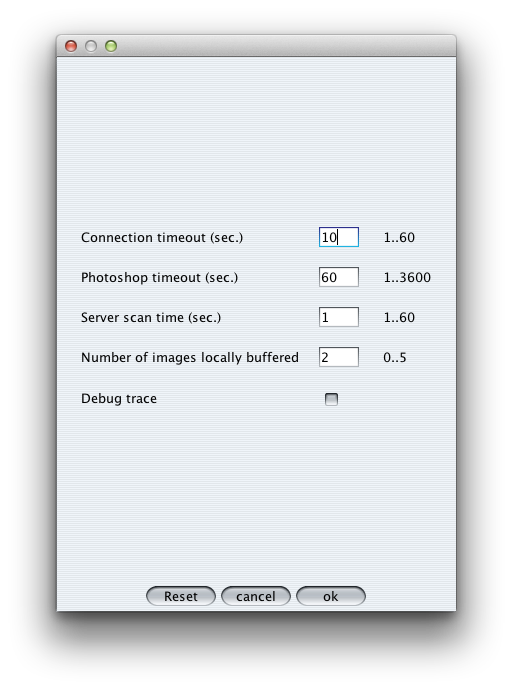
Connection timeout (Sec.): Try for X number of seconds to connect to the Pixometry server before displaying a message that the connection cannot be established.
Photoshop timeout (Sec.): Try to execute the Photoshop command for X number of seconds before displaying a message that the Photoshop command cannot be executed.
Server scan time (Sec.): Scan the server each X number of seconds to check for new images in the Inspector queue.
Number of images locally buffered: Number of images that will already be downloaded to and stored on the local machine to be able to open the next image from the queue really quick.
Debug trace: Enable this option to generate more log messages to get more info on problems. Log file is stored here:
~user-home-dir/Pixometry Inspector/log/Inspector.log.
Metadata…
In Inspector, image metadata fields can be displayed. One reason to do this is to give retouchers working with Inspector certain instructions for specific images. For example, the special instructions field (IPTC metadata) can be useful for this purpose. XMP data may be used also. Below a screenshot of the metadata window:
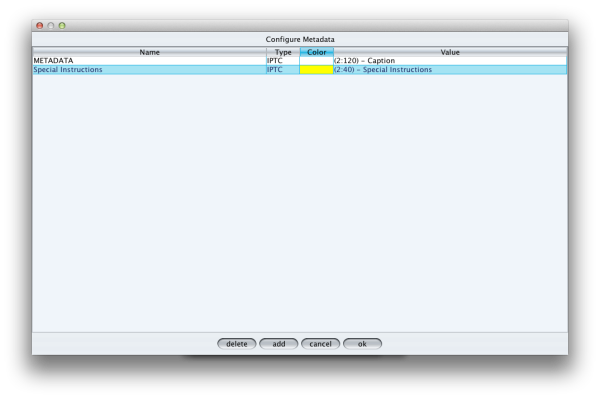
A background color can be chosen (in this case yellow for the special instructions field) to make it stand out in Inspector. Below a screenshot of how it looks in the Inspector queue window:
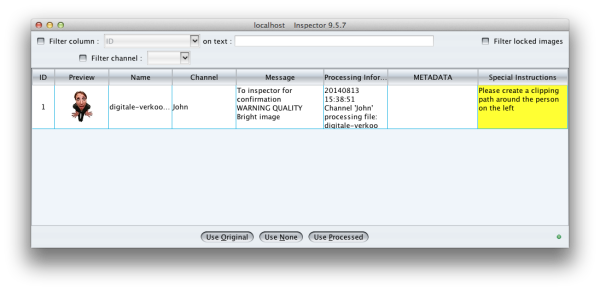
Or in the Inspector main window (see Using Inspector to learn about the different ways of working with Inspector):
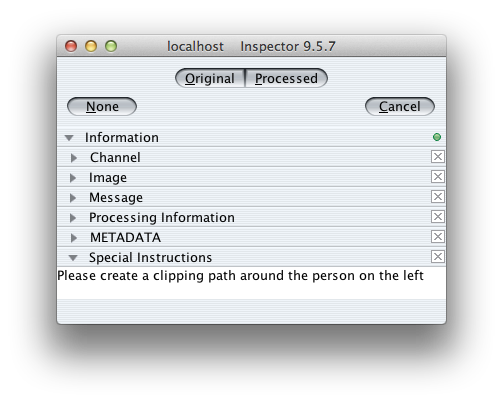
Note that the yellow color is only visible in the Queue window.
Play Sound
If checked, plays a sound every time a new image arrives in the queue.
Show Preview in Queue
If checked, shows a thumbnail of the processed image in the Inspector queue window.
Show Save & Send Back
If checked, an additional button will be available when images are opened in Photoshop: the “save and send back” button. It allows you to store a partially finished image back to the Inspector queue, to finish later (or by someone else).
Always On Top
If checked, keeps the Inspector window always on top, so that it cannot hide behind other windows on the desktop. This allows for quick access to the approve buttons without having to search for the Inspector window.
Open processed only
Open only the processed image, instead of original and processed. Especially in working with PSD files this can be an option, as the original image can be in the processed file as a layer.
Tile images
If checked, images are opened with the Photoshop option “tile vertically”.
Select language
Choose the language for the Inspector
Select zoom percentage
“Auto” will open the image without further instruction to Photoshop, and the image will be scaled by Photoshop, according to Photoshop rules. Alternatively, you can choose a fixed zoom percentage, like always open on 100% (one pixel on screen is one pixel in the image).
Select Photoshop version
If Photoshop is installed in its default location, Inspector will automatically detect the Photoshop version, and it will work without having to select something here. However, if you have multiple versions of Photoshop on the workstation, you can use the drop-down menu to select the version that you want to use. If Photoshop is not installed at its default location, or your (new) Photoshop version is not yet automatically detected by Inspector, you can use the “Add…” button to manually locate a Photoshop version, and then choose “user” in the drop-down menu.
Note that on MacOSX you need to go into the contents of the Photoshop app, and the path will look like this:
/Applications/Adobe Photoshop CC 2014/Adobe Photoshop CC 2014.app/Contents/MacOS/Adobe Photoshop CC 2014
To find this path using the file browser, you need to change the type of files to “all files”.